Keeping your car’s brakes in good shape is key to safe driving. If you like to do things yourself, learning to replace brake pads can save you money and time. This guide will show you how to replace your car’s brake pads easily and safely.
Key Takeaways
- Understand the basics of brake pads and their function in your car’s braking system
- Identify the signs of worn brake pads and when they need to be replaced
- Gather the necessary tools and materials for a successful brake pad replacement
- Follow a safe and effective step-by-step process to change your brake pads
- Properly break in the new brake pads to ensure optimal performance and longevity
Understanding Brake Pad Basics and Their Function
Brake pads are key to your car’s safety and performance. They turn your car’s energy into heat, slowing it down. There are many types of brake pads, each with its own benefits.
Types of Brake Pads Available
The main brake pad types are:
- Ceramic brake pads – Known for being durable, quiet, and smooth. They’re a top pick for many.
- Semi-metallic brake pads – Mix metal and other materials for more power and life. But, they can be noisier and dustier.
- Organic brake pads – Made from non-metal materials. They’re kinder to rotors and quieter. But, they don’t last as long.
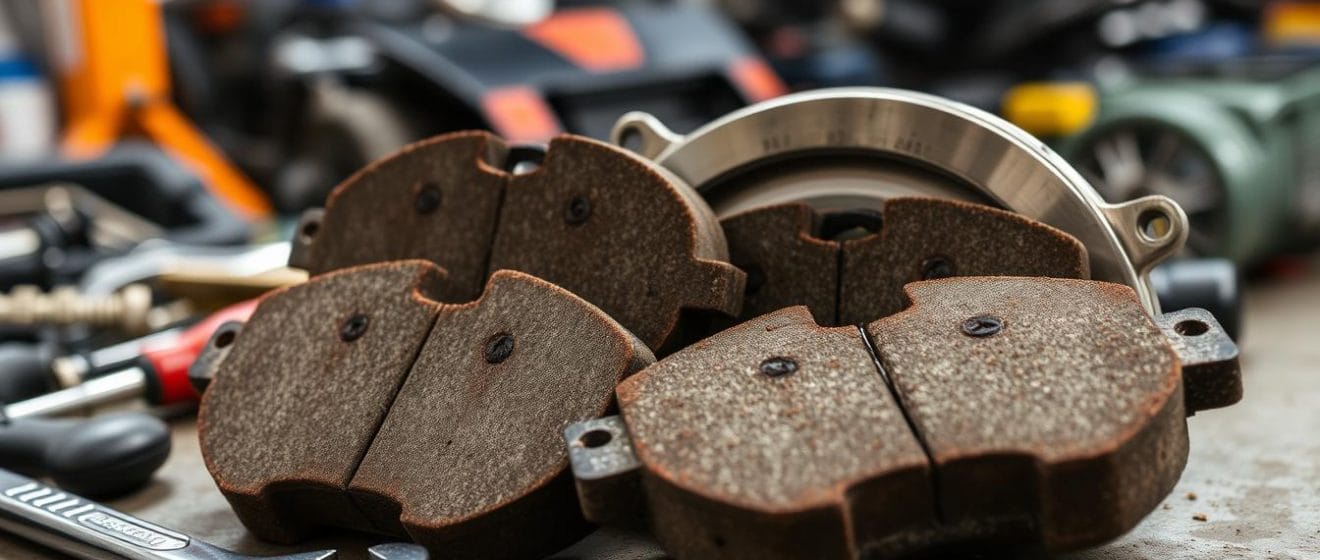
Signs of Worn Brake Pads
Knowing when to replace brake pads is crucial. Look out for these signs:
- Squeaking or grinding noises – This means the pads are worn down and rubbing against the rotor.
- Reduced braking effectiveness – If stopping takes longer, your pads are likely worn out.
- Visible pad wear indicators – Many cars have lights that turn on when pads need replacing.
How Brake Systems Work
Modern brake systems turn a car’s energy into heat. This heat is then released through the brakes. When you press the brakes, the pads press against the rotors, creating friction. This friction slows the wheels and stops the car.
| Brake Pad Type | Characteristics | Advantages | Disadvantages |
|---|---|---|---|
| Ceramic Brake Pads | Composed of ceramic materials and copper fibers | Durability, low noise, smooth braking performance | Generally more expensive than other options |
| Semi-Metallic Brake Pads | Contain a combination of metal and other materials | Increased braking power and lifespan | May produce more noise and dust |
| Organic Brake Pads | Made from non-metallic materials | Gentler on rotors, quieter braking | Shorter lifespan compared to other types |
Knowing about brake pads and how they work helps you keep your car safe and running well.
Essential Tools and Materials Needed for Brake Pad Replacement
Changing your vehicle’s brake pads is easy if you have the right tools. You’ll need a few key items to do the job right and safely. Start by gathering the necessary tools for a smooth brake pad replacement.
You’ll first need a car jack to lift your vehicle. A lug wrench is also essential for removing wheels. A C-clamp helps compress the caliper piston when installing new pads.
Other important items include:
- A set of brake pad replacement tools, like a brake pad spreader or caliper tool
- A brake cleaner for cleaning brake parts before installation
- A torque wrench to tighten lug nuts correctly
- Gloves and eye protection for safety
Having these brake pad replacement tools makes the job easier. It also helps avoid problems during installation. Always follow the manufacturer’s instructions and wear safety gear when working on brakes.
| Tool/Material | Purpose |
|---|---|
| Car Jack | Lift the vehicle to access the brake components |
| Lug Wrench | Remove the wheels to gain access to the brake calipers |
| C-Clamp | Compress the caliper piston when installing new brake pads |
| Brake Pad Replacement Tools | Specialized tools for removing and installing brake pads |
| Brake Cleaner | Clean the brake components before installation |
| Torque Wrench | Ensure the lug nuts are properly tightened |
| Gloves and Eye Protection | Personal protective equipment for safety |
With the right brake pad replacement tools and materials, you’re ready to replace brake pads confidently and easily.
Safety Precautions Before Starting the Job
Changing brake pads requires top safety priority. Before starting, make sure you’re safe and your vehicle is too. Here are the key safety tips to remember.
Proper Vehicle Support Methods
Make sure your vehicle is stable during brake pad replacement. Use car jack stands and wheel chocks to keep it steady. Never just rely on the vehicle’s jack, as it can be unstable.
Personal Protection Equipment Requirements
Wearing the right PPE is crucial. Always wear safety glasses to protect your eyes and work gloves for your hands. These simple steps help keep you safe while working.
Workspace Safety Considerations
Set up your workspace safely. Make sure it’s well-lit, clean, and free from clutter. Secure tools to prevent tripping. Also, keep your area clear to avoid accidents.
By following these safety tips, you can safely replace your brake pads. Remember, safety is key to a successful brake job.
| Safety Gear | Purpose |
|---|---|
| Car Jack Stands | Provide stable support for the vehicle during brake pad replacement |
| Wheel Chocks | Prevent the vehicle from rolling while working on the brakes |
| Safety Glasses | Protect your eyes from debris and dust during the process |
| Work Gloves | Safeguard your hands from sharp edges and potential injuries |
Preparing Your Vehicle for Brake Pad Replacement
Before you start changing your brake pads, make sure your vehicle is ready. This step is key for a smooth replacement, keeping you safe and your new parts lasting longer. Let’s look at the important steps to get your car ready for this maintenance task.
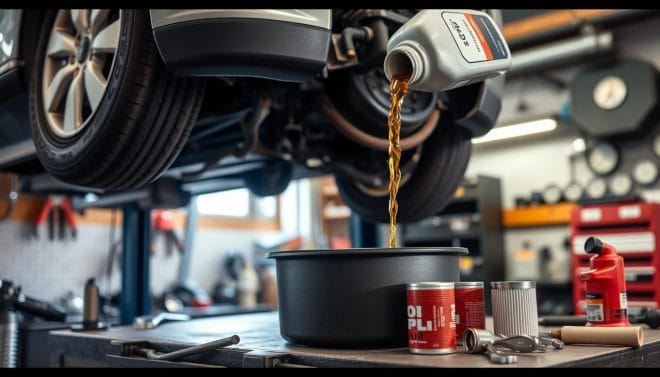
Check Brake Fluid Levels
First, check the brake fluid level. Low fluid might mean a leak or worn parts, which need fixing before you replace the pads. Use the brake fluid type your car’s maker recommends and fill the reservoir as needed.
Inspect Brake Rotors
Next, check the brake rotors for wear, grooves, or uneven surfaces. If they’re too worn or damaged, you’ll need to replace or resurface them before putting in the new pads. This ensures your brakes work well and you drive safely.
Lubricate Brake Caliper Slides
The brake caliper slides help the caliper move and engage the pads right. Before taking off the wheels, apply some high-quality lubricant to these slides. This makes sure everything moves smoothly during the pad replacement.
Prepare for Wheel Removal
Lastly, get your tools ready, like a lug wrench and a jack, for safely removing the wheels. This gives you direct access to the brake parts, making it easier to replace the pads.
By carefully preparing your vehicle, you’re setting up for a successful and safe brake pad change. Always check your owner’s manual for specific instructions and safety tips for your car.
| Task | Importance |
|---|---|
| Brake Fluid Check | Ensures proper fluid levels and identifies potential leaks or worn components before replacement. |
| Rotor Inspection | Determines if the rotors need to be resurfaced or replaced to maintain optimal braking performance. |
| Caliper Lubrication | Promotes smooth caliper operation and proper brake pad engagement during the replacement process. |
| Wheel Removal Preparation | Ensures safe and efficient access to the brake components for the brake pad replacement. |
How to Change Brake Pads: A Step-by-Step Guide
Changing your vehicle’s brake pads is a key maintenance task. It greatly improves your safety on the road. This guide will show you how to remove the caliper, install brake pads, clean the rotor, and replace brake hardware.
Removing the Wheel
First, park your vehicle on a level surface and engage the parking brake. Use the right tools to loosen and remove the lug nuts. Then, take off the wheel. This gives you full access to the brake caliper and pads.
Accessing the Brake Caliper
Next, find the brake caliper and check for wear or damage. Clean the caliper’s surface with brake cleaner and a rag. This makes installing the new brake pads easier.
Installing New Brake Pads
With the caliper accessible, remove the old brake pads and clean the mounting surface. Apply brake lubricant to the caliper’s pins. Then, put in the new brake pads, making sure they fit right. Secure the caliper and check the pads are in place.
After installing, clean the rotor and replace any worn brake hardware. Finally, put the wheel back on and tighten the lug nuts as the manufacturer suggests.
By following these steps, you’ll replace your brake pads safely and effectively. This keeps your vehicle’s braking system working well for longer.
Common Mistakes to Avoid During Installation
Changing your vehicle’s brake pads is key for safety and good braking. But, mistakes during installation can harm your brakes. We’ll look at common errors to avoid when replacing brake pads.
One big mistake is not orienting brake pads right. Wrong brake pad orientation leads to uneven wear and early pad failure. Always follow the manufacturer’s guide and place pads correctly.
Another mistake is not retracting the caliper piston before adding new pads. This step is vital for the caliper to grip the rotor well. Not retracting the piston can cause uneven wear and unsafe braking.
- Make sure to use the right torque specifications when securing pads and caliper. Wrong torque can cause problems like vibration, early wear, and brake line damage.
- Check brake system parts for wear or damage before installing new pads. Replacing worn-out parts is key for safe braking.
Avoiding these mistakes and following best practices ensures a safe brake pad replacement. This keeps your vehicle’s braking system in top shape.
| Mistake to Avoid | Potential Consequence |
|---|---|
| Incorrect brake pad orientation | Uneven wear, premature pad failure |
| Failure to retract caliper piston | Binding, uneven pad wear, braking issues |
| Improper torque specifications | Vibration, premature wear, brake line damage |
| Overlooking brake system components | Potential safety hazards, compromised braking performance |
By being careful and using the right techniques, you can replace brake pads safely. This keeps your vehicle’s braking system working well.

Breaking in New Brake Pads Properly
It’s key to break in new brake pads right to get the best out of your vehicle’s brakes. The brake pad bedding process, or brake pad burnishing, makes sure the pads and rotors work well together.
The Bedding Process Explained
The bedding process uses controlled stops to heat up the new brake pads and rotors. This creates a good friction surface. It helps the pads fit the rotors better, making your brakes work better.
It’s vital to follow the right break-in steps for your brakes to perform at their best.
Recommended Break-in Procedures
- Begin by driving at a moderate speed and gently pressing the brakes, slowly increasing the pressure.
- Make 8-10 stops from 30-35 mph, letting the brakes cool down fully between stops.
- Don’t use hard braking or stop completely during the bedding process.
- After the first bedding, drive for about 100 miles with normal braking to condition the pads and rotors more.
- Stay away from hard braking or high-speed stops for the first 500 miles after replacing the brake pads.
By sticking to these brake pad bedding and break-in steps, you’ll get the best brake performance optimization. You’ll also make your new brake pads last longer.
Maintenance Tips for Longer Brake Pad Life
Keeping your vehicle’s brake pads in good shape is key for safe driving. Simple maintenance tips can help your brake pads last longer. This improves your brake system’s performance.
Monitoring Driving Habits
Your driving habits affect your brake pads’ wear. Try to avoid sudden stops and aggressive braking. Also, don’t speed too much. Instead, brake smoothly and keep a safe distance from others.
Regular Brake Inspections
It’s important to check your brakes regularly. Have a mechanic inspect your brake pads and other parts at least once a year. This can catch problems early and save you money on repairs.
Timely Brake Fluid Changes
Brake fluid is vital for your brakes. It should be changed as recommended by your car’s manual. This is usually every 2-3 years. Not changing it can harm your brakes’ performance and damage the system.
| Maintenance Task | Recommended Interval |
|---|---|
| Brake Pad Inspection | At least once a year or when symptoms of wear are noticed |
| Brake Fluid Change | Every 2-3 years or as per manufacturer’s recommendation |
Following these maintenance tips can make your brakes work better for longer. Regular brake system maintenance and careful driving habits keep your brakes in great shape. This makes your commute safer.

When to Seek Professional Help
Changing brake pads can be easy for some car owners. But, there are times when you need a pro brake service technician. Knowing when to get help can save you time, money, and keep you safe.
If you notice any of these brake problems, get a pro professional brake service provider:
- Persistent or unusual brake noises, such as grinding, squeaking, or clicking, which may indicate more serious complex brake issues
- Spongy or unresponsive brake pedal, which could be a sign of air in the brake lines or a problem with the brake fluid
- Uneven brake pad wear or unusual vibrations, which may require brake system diagnostics to identify the underlying cause
- Leaks in the brake system, which should be addressed immediately to prevent further damage
- Any brake system issues that you feel unequipped to handle or diagnose properly
While many can replace brake pads, some jobs are too complex. A trusted professional brake service provider can ensure your brakes are safe and working right.
| Situation | Recommended Action |
|---|---|
| Persistent or unusual brake noises | Seek professional brake service for advanced diagnostics |
| Spongy or unresponsive brake pedal | Consult a professional brake service technician |
| Uneven brake pad wear or vibrations | Undergo brake system diagnostics with a professional |
| Brake system leaks | Immediately seek professional brake service attention |
| Issues you feel unequipped to handle | Let a professional brake service provider take care of it |
Remember, your safety and your car’s brake system are key. If unsure, always get a qualified professional brake service specialist. They’ll make sure your brakes are safe and working well.
Conclusion
We’ve covered everything you need to know about changing your car’s brake pads. You now understand the basics of brake systems and how to install new pads. You’re ready to tackle this DIY car maintenance task with confidence.
Keeping your brakes safe is key for your safety and that of your passengers. Regular checks and replacements of brake pads keep your car’s brakes working well. This can also save you money on expensive repairs later on.
With the knowledge from this guide, you can replace brake pads yourself. This saves money and gives you a sense of accomplishment. Remember, checking your brakes and replacing pads when needed is crucial for your safety and your car’s performance.
أسئلة وأجوبة
What types of brake pads are available?
There are three main types of brake pads: ceramic, semi-metallic, and organic. Each has its own performance, wear, and cost.
How do I know when it’s time to replace my brake pads?
Look out for signs like squeaking or grinding noises. Also, a spongy or low brake pedal is a warning sign. Visible wear indicators on the pads are another clue.
What tools and materials are needed for brake pad replacement?
You’ll need a jack, lug wrench, C-clamp, brake cleaner, and a caliper tool. A torque wrench might also be necessary.
What safety precautions should I take when replacing brake pads?
Always use jack stands for safety. Wear safety glasses and gloves. Make sure your workspace is clean and well-lit.
How do I properly prepare my vehicle for brake pad replacement?
First, check the brake fluid levels. Then, inspect the brake rotors. Finally, lubricate the caliper components before removing the wheels.
What are the common mistakes to avoid during brake pad installation?
Avoid putting the brake pads on the wrong way. Don’t forget to retract the caliper piston. Always follow the torque specs.
How do I properly break in new brake pads?
Start with gentle stops and then move to stops from higher speeds. This helps condition the pads for best performance.
What can I do to extend the lifespan of my brake pads?
Drive safely and regularly check your brakes. Change the brake fluid as needed. These habits help your brake pads last longer.
When should I seek professional help for brake maintenance or repairs?
If you face complex brake issues or need advanced diagnostics, get a mechanic’s help. Or if you’re not sure about doing it yourself.